How to view and test a Decision Tree's journey
Creating and fine-tuning a Decision Tree is a crucial part of ensuring a smooth user experience. To review and test your Decision Tree's journey, you can use the 'view mode.' This feature allows you to see the Decision Tree from the customer's perspective and navigate through the nodes to ensure it's functioning as intended.
Here's a step-by-step guide on how to use this feature effectively:
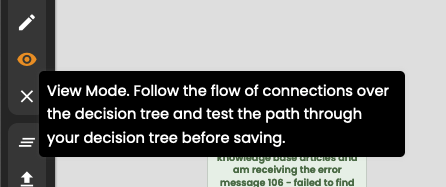
1. Access View Mode
Open the Decision Tree Editor. On the left-hand side of the Decision Editor display, look for the 'View Mode' option.
2. Navigate to the View Tab
Once you've selected 'View Mode,' head to the right-hand side of the screen.
Locate and select the 'more' button to open up the view tab.
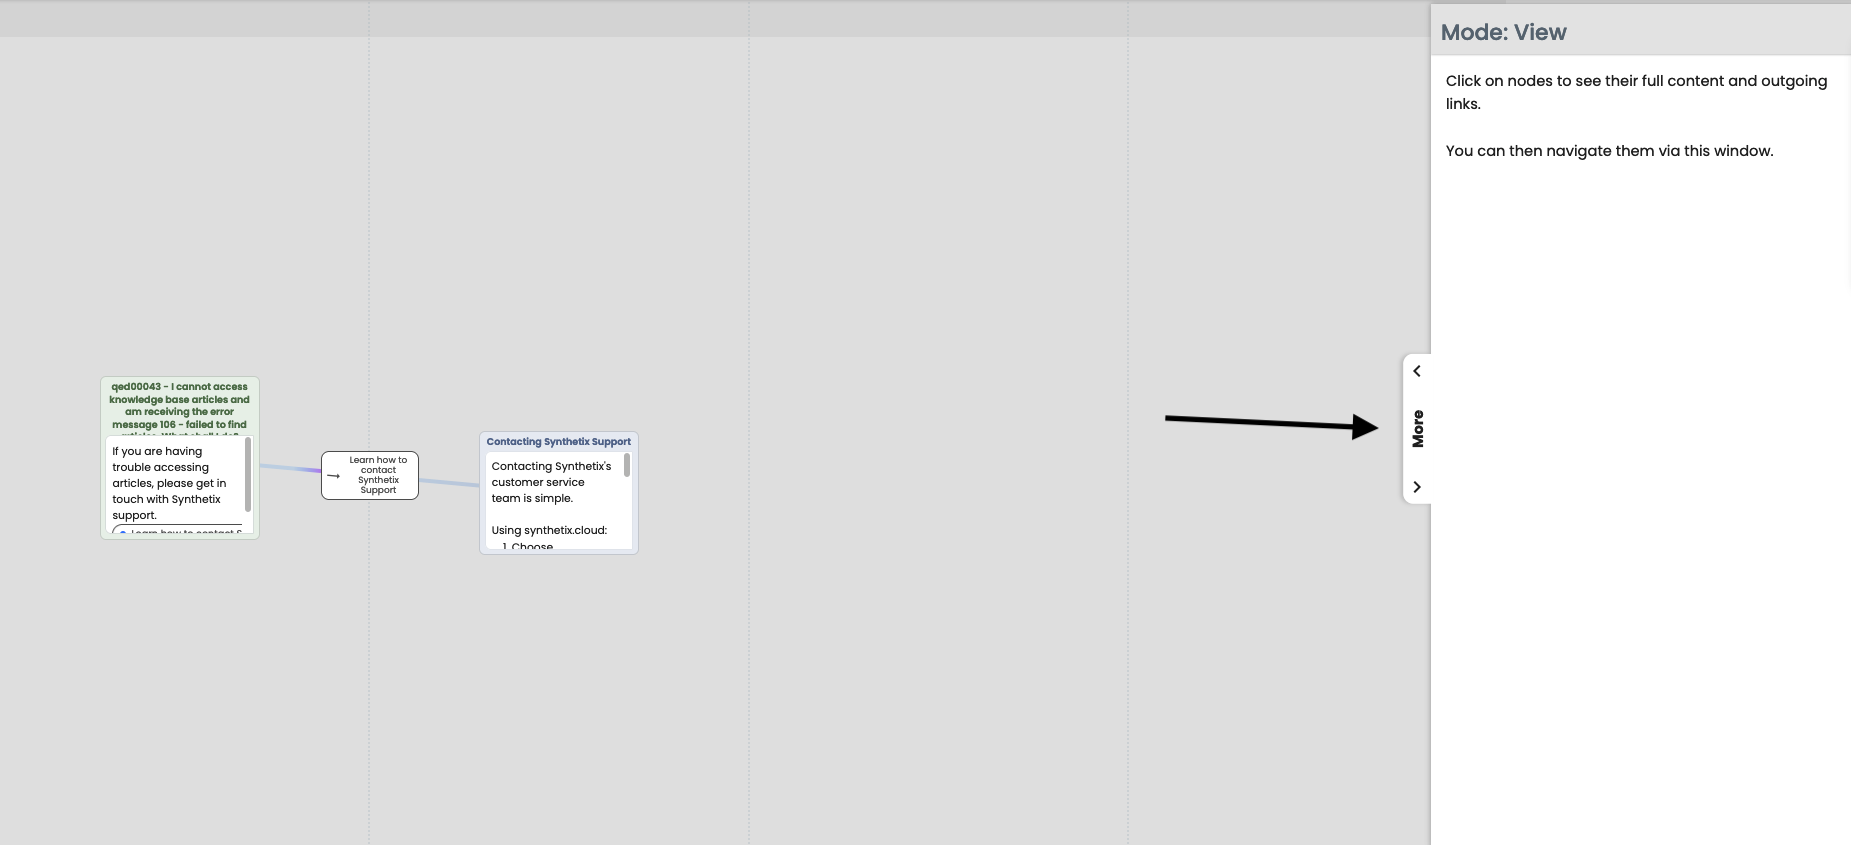
3. Preview Your Decision Tree
In the view tab, you'll see a representation of the currently selected node, which displays how it appears to customers.
Here, you have the ability to navigate through the Decision Tree nodes just as a customer would.
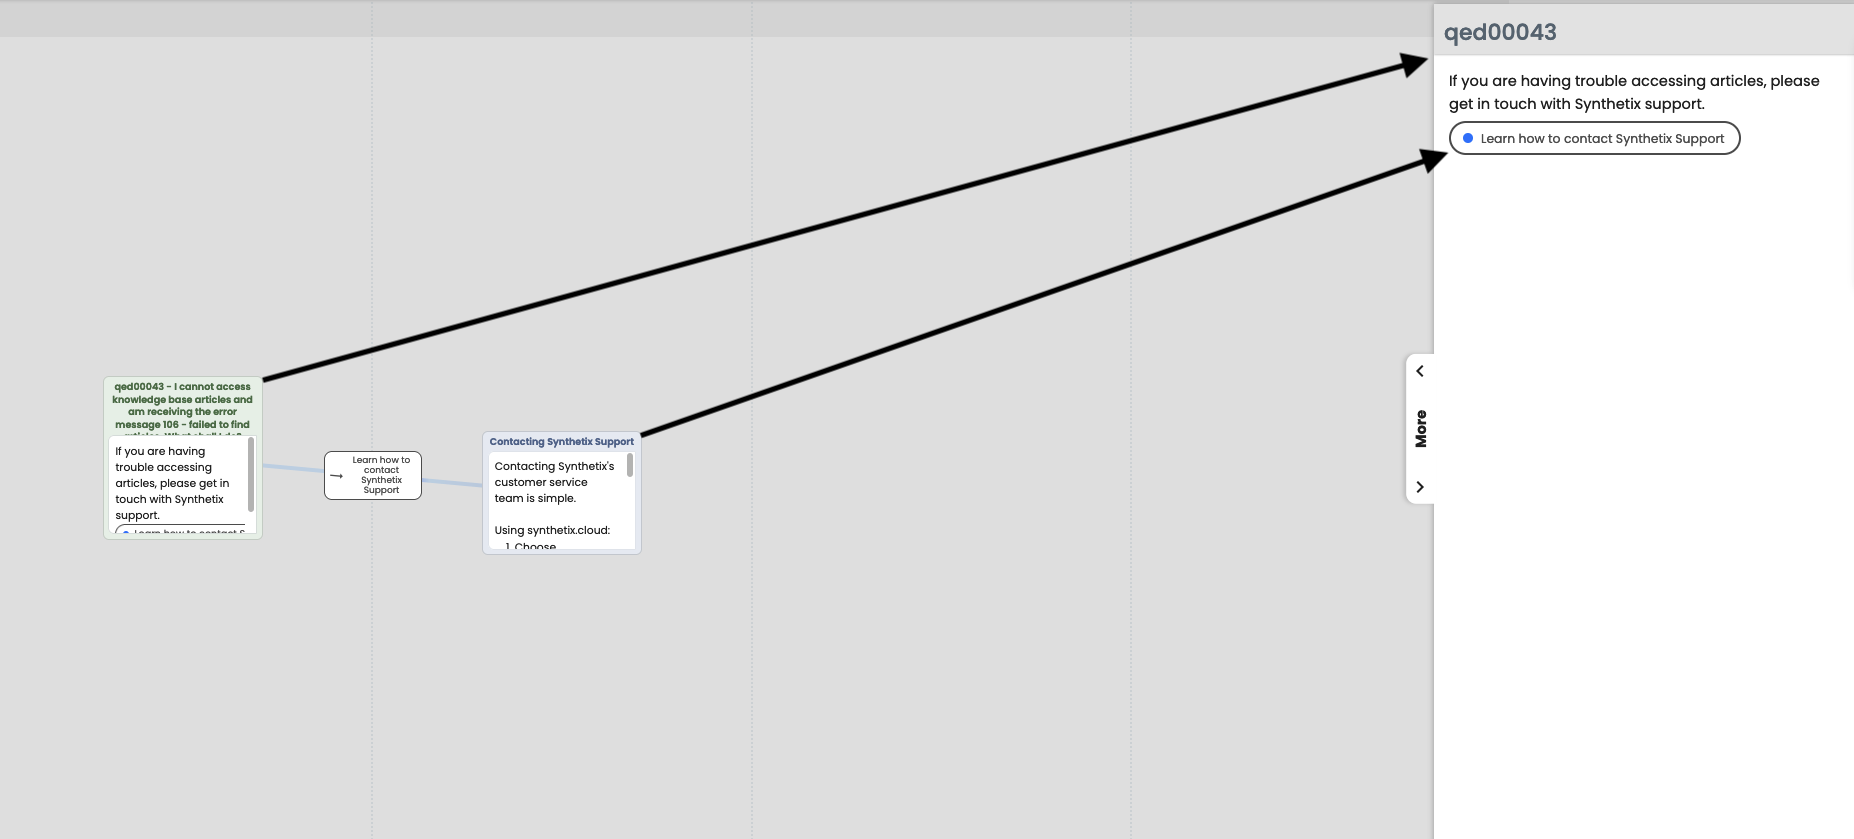
4. Test the Customer Journey
The view tab enables you to simulate the customer's journey. You can follow the prompts and actions within the selected node to move through the Decision Tree nodes.
This allows you to ensure that the user's experience aligns with your intended customer journey.
5. Post-Editing Viewing
It's important to note that after making changes to a node that is currently selected, you'll need to re-select the node to see the changes in view mode. This step ensures that the most recent updates are accurately reflected in the customer's view.
Testing and viewing your Decision Tree as a customer is a vital step in ensuring that it functions seamlessly and meets your users' needs. By following the steps outlined in this guide and using the 'view mode' feature, you can confidently fine-tune your Decision Tree to provide an optimal user experience. Don't forget to regularly review and update your Decision Tree to keep it aligned with your users' evolving needs.
Here's a step-by-step guide on how to use this feature effectively:
1. Access View Mode
Open the Decision Tree Editor. On the left-hand side of the Decision Editor display, look for the 'View Mode' option.
2. Navigate to the View Tab
Once you've selected 'View Mode,' head to the right-hand side of the screen.
Locate and select the 'more' button to open up the view tab.
3. Preview Your Decision Tree
In the view tab, you'll see a representation of the currently selected node, which displays how it appears to customers.
Here, you have the ability to navigate through the Decision Tree nodes just as a customer would.
4. Test the Customer Journey
The view tab enables you to simulate the customer's journey. You can follow the prompts and actions within the selected node to move through the Decision Tree nodes.
This allows you to ensure that the user's experience aligns with your intended customer journey.
5. Post-Editing Viewing
It's important to note that after making changes to a node that is currently selected, you'll need to re-select the node to see the changes in view mode. This step ensures that the most recent updates are accurately reflected in the customer's view.
Testing and viewing your Decision Tree as a customer is a vital step in ensuring that it functions seamlessly and meets your users' needs. By following the steps outlined in this guide and using the 'view mode' feature, you can confidently fine-tune your Decision Tree to provide an optimal user experience. Don't forget to regularly review and update your Decision Tree to keep it aligned with your users' evolving needs.
