How to Add a Compliance Checkbox to an Article
Ensuring compliance with specific guidelines or policies is crucial for many organisations. Adding a compliance checkbox to your articles can help you track and confirm that readers have acknowledged and agreed to certain terms or conditions. Here's a guide on how to add a compliance checkbox to an article:
1. In the Editor, begin the usual steps for creating a new article or start the article edit process for articles that already exist.
2. Toggle on the 'User confirmation required’ option in the ‘Advanced article configurations options'.
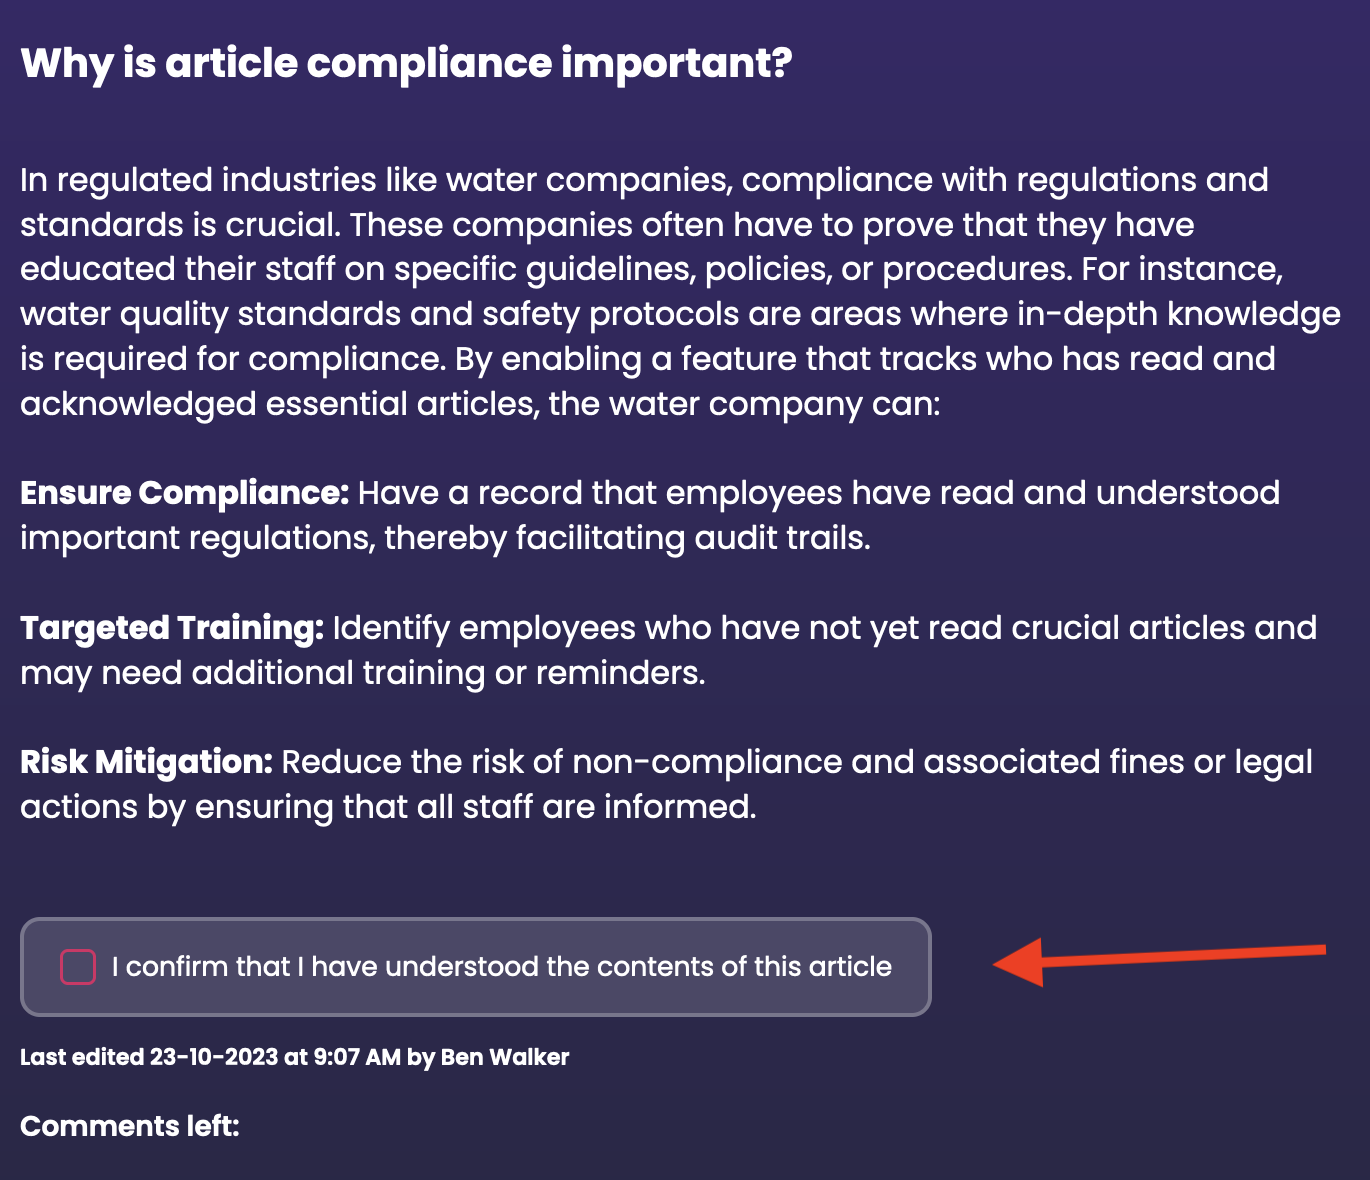
3. Customise the text that will accompany the checkbox. For example you could add the text 'I confirmed that I have read and understood the contents of this article' or 'I agree to follow the guidelines set out in this article.' Choose the wording that best aligns with your compliance requirements. If no text is entered, default text will accompany the checkbox.

4. Follow the usual steps of saving and publishing the article to the Knowledge Base. After publishing the article, a compliance checkbox will now be included at the bottom of the article after the main body of the article's content.
Monitoring Article Compliance
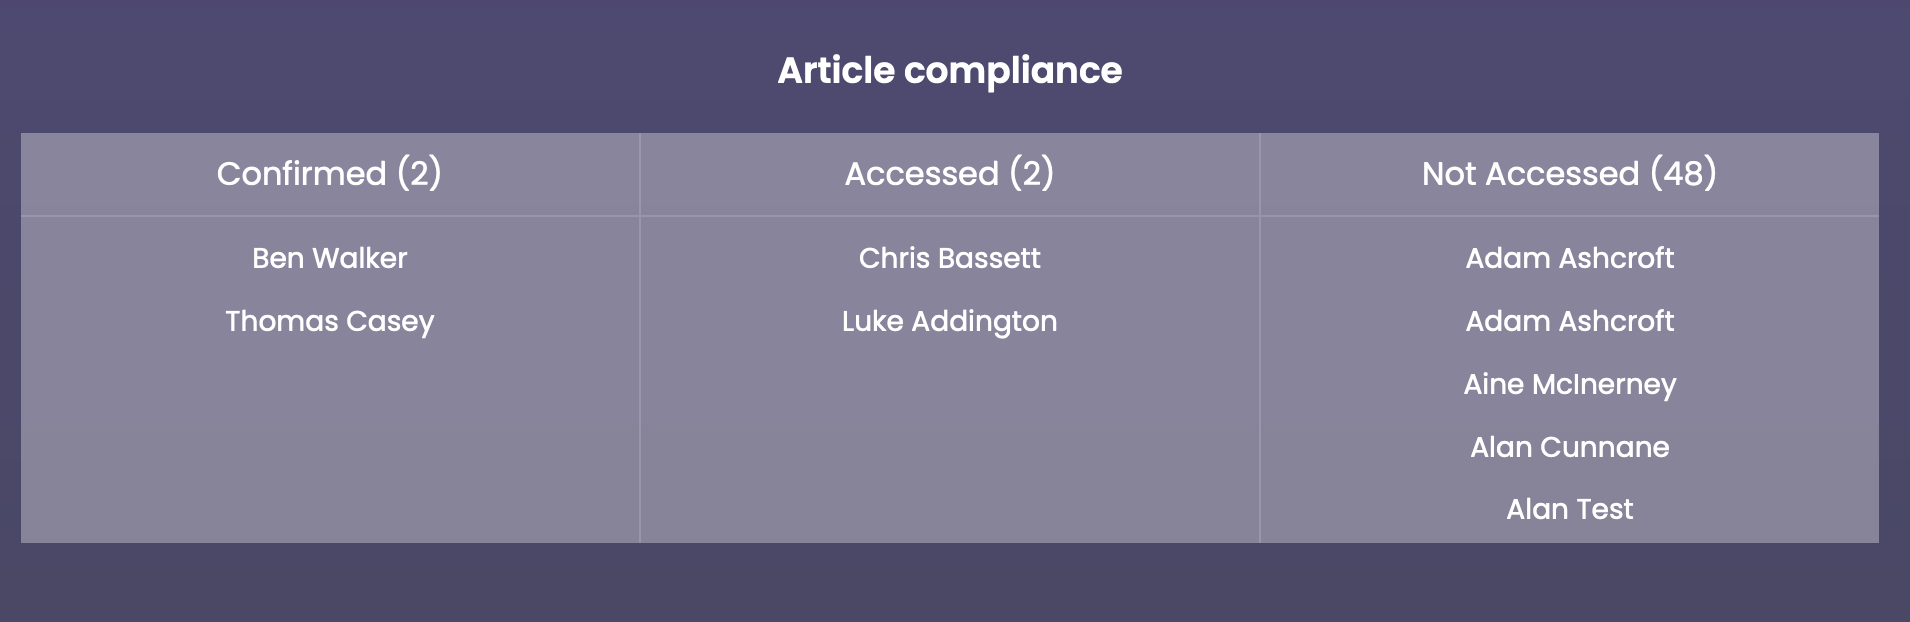
To help you track the level of compliance and adherence to your guidelines or policies, you can view the Article Compliance table for each article in the Article Stats section. The table will list all of the agents who have Confirmed, Accessed and Not Accessed the article.
Confirmed - a list of users who have checked the compliance checkbox
Accessed - a list of users who have visited the article, but have no checked the compliance checkbox
Not Accessed - a list of users who have not visited the article yet
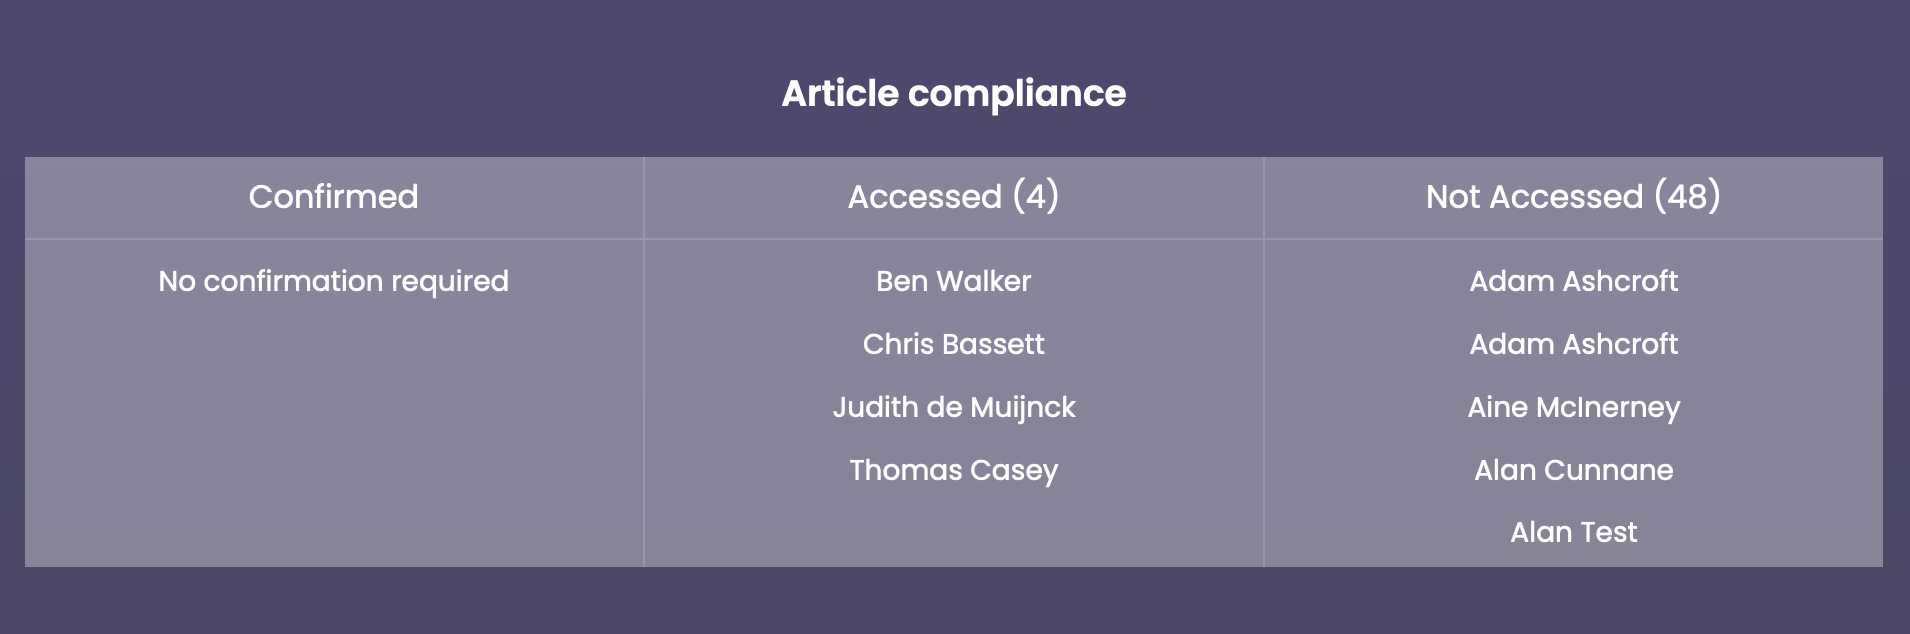
Even if an article does not have a complaince checkbox, you are still able to analyse who has Accessed and Not Accessed the article. The confirmed column will show the message 'No confirmation required' if there is no compliance checkbox for the article.
1. In the Editor, begin the usual steps for creating a new article or start the article edit process for articles that already exist.
2. Toggle on the 'User confirmation required’ option in the ‘Advanced article configurations options'.
3. Customise the text that will accompany the checkbox. For example you could add the text 'I confirmed that I have read and understood the contents of this article' or 'I agree to follow the guidelines set out in this article.' Choose the wording that best aligns with your compliance requirements. If no text is entered, default text will accompany the checkbox.
4. Follow the usual steps of saving and publishing the article to the Knowledge Base. After publishing the article, a compliance checkbox will now be included at the bottom of the article after the main body of the article's content.
Monitoring Article Compliance
To help you track the level of compliance and adherence to your guidelines or policies, you can view the Article Compliance table for each article in the Article Stats section. The table will list all of the agents who have Confirmed, Accessed and Not Accessed the article.
Confirmed - a list of users who have checked the compliance checkbox
Accessed - a list of users who have visited the article, but have no checked the compliance checkbox
Not Accessed - a list of users who have not visited the article yet
Even if an article does not have a complaince checkbox, you are still able to analyse who has Accessed and Not Accessed the article. The confirmed column will show the message 'No confirmation required' if there is no compliance checkbox for the article.
